
Touhou Koumakyou New Classic Stages 1–6 without wasting a credit
Power, bombs, and midboss timing from the mist to the clock tower.
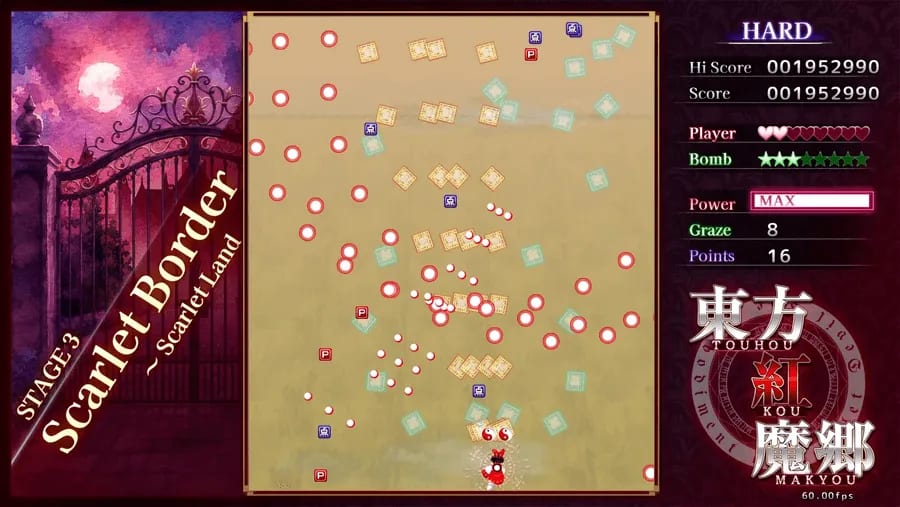
This is a resource route for Touhou Koumakyou New Classic’s six-stage story, not a spell encyclopedia. New Classic’s English HUD names Stage 2 Lake Sprite ~ Water Magus (Cirno) and Stage 3 Scarlet Border ~ Scarlet Land (Meiling). New Classic adds extra enemy waves at the end of Stage 3, so the Classic corner safespot after Meiling is gone — stream or bomb. Stage 1 is Rumia, Stage 4 is Patchouli’s library with Koakuma as midboss, Stage 5 is Sakuya, Stage 6 is Remilia with Sakuya and Patchouli as midbosses. Easy ends at Stage 5. Extra unlocks after a Normal-or-higher 1CC — see Extra Stage.
Reimu A or Marisa A is enough for a first Normal credit. Bind notes are on controls. Remilia’s cards are on How to Beat Remilia; this page only tells you how to arrive there with lives and 128 power.
Resource rules for the whole credit
Power maxes at 128. Enter every boss at 128 if you can. Deaths dump power; that dump is why a bomb is usually cheaper than a life. Fly to the collection line after big cancels. Point items are worth more at height; original extends sit at 10, 20, 40, and 60 million. New Classic uses the same scoring core (point items, collection line, graze). Do not suicide-graze Stage 5 knives for a threshold you will miss. Challenge Mode learns the route; a 1CC is a limited-life credit with no continue.
Stage 1 — Rumia
Stage 1 teaches streaming and the collection line. Gather power, do not bomb the opening fairies, and treat Daiyousei’s midboss as a vacuum: kill, rise, collect, drop back. Rumia’s nonspells are random enough that unfocused streaming beats panicked focus. Moonlight Ray is two rotating lasers — sit in the gap and let the pair sweep. Leave with full bombs and 128 power. If you died here, your binds are wrong or you are tapping shot.
Stage 2 — Lake Sprite ~ Water Magus (Cirno)
Stay unfocused on fairy lanes, then focus for dense ice. Daiyousei returns as a midboss; still a collect unless you are already off-center. Cirno’s Icicle Fall drops ice from above — do not camp under a spawn column. Perfect Freeze is the teaching card: bullets hang, then home. Move during the freeze so the aimed volley is thrown away from your next position, then micro the leftovers. Bomb it only after you have already failed the misdirect. Leave with 128 power.
Stage 3 — Scarlet Border ~ Scarlet Land (Meiling)
This is the first real spike. Stream mid-stage aimed shots unfocused, then focus for rainbow gates. Meiling is both midboss and boss. Spend a midboss bomb only if you need the cancel to recapture power. The usual mistake is holding focus the entire fight and getting pushed into a corner. Unfocus to change lanes when a ring closes; focus to thread the next static gap. Selaginella-style rotations want you under her, slightly off-center, walking against the spin. Bomb her last card if you are on one life.
Stage 4 — Library (Koakuma, Patchouli)
Koakuma is a midboss without named cards: books and aimed shots. Sit under her and collect. Do not bomb Koakuma unless a book wall has already closed. Patchouli’s spell set changes with your shot (fire for Reimu A, water for Reimu B, wood for Marisa A, earth for Marisa B). The route rule is the same: stay under Patchouli, respect book hitboxes, and do not chase her into a bullet you created by moving. Hit her, not the props. Bomb a card that has already randomized you into a corner. Leave at 128.
Stage 5 — Sakuya
Sakuya’s hallway is the credit’s filter. Knives stop, then run. Graze is bait on a first Normal 1CC. Stream aimed knife volleys unfocused, then focus when stopped knives resume. Square-style cards want you to pick a gap and commit; mid-square corrections eat you. If you are on two lives entering her last card, bomb it. Stage 6 will ask for those lives by name.
Stage 6 — Remilia (Sakuya and Patchouli midbosses)
The clock tower opens with a dense item section. A scoring player bombs that cancel into the collection line. A first 1CC does not, unless the wave is already a death.
Sakuya midboss includes Conjuring “Eternal Meek” on Normal and up: knives in a messy field with a slightly safer pocket toward her right. Do not hunt the pocket so hard you walk into a random knife. Bomb Eternal Meek if the 1CC is on the line. Patchouli midboss is a shorter library reprise — hit her, collect, stop greeding.
Remilia herself is a separate fight: Star of David / Young Demon Lord lasers, Scarlet Netherworld rain, Vampire Clock cycles, Scarlet Shoot / Scarlet Meister, and Scarlet Gensokyo as the last survival-leaning card. Timeout versus capture and shot picks are in How to Beat Remilia. The walkthrough rule is only this: arrive with 128 power, at least one bomb, and more than one life. If you cannot say that at the midboss transition, you already spent the credit on Meiling or Sakuya.
Bomb almost never on Stages 1–2 except a broken Perfect Freeze; bomb Meiling’s last card if leaking; bomb a cornered Patchouli card, not Koakuma; bomb Sakuya’s last card on two lives; bomb Stage 6’s opening only for a scoring PoC or a sure death. Timeout Scarlet Gensokyo rather than panic-bombing a survival card. Then Extra.
Frequently Asked Questions
Quick answers about New Classic, Classic, shot types, and Extra Stage.
Does Easy include Remilia?
No. Easy ends at Stage 5. You need Normal or higher to fight Remilia, and a no-continue Normal-or-higher clear to unlock Extra.
What are the New Classic HUD names for Stages 2 and 3?
Stage 2 is Lake Sprite ~ Water Magus (Cirno). Stage 3 is Scarlet Border ~ Scarlet Land (Meiling). Stage 4 is the library (Patchouli, midboss Koakuma).
Should I bomb Stage 6's opening waves?
Only if you are scoring the cancel into the collection line, or if the wave is already a death. A first 1CC should carry those bombs into Eternal Meek and Remilia. Full Remilia notes are on How to Beat Remilia.
Do extends still happen at 10/20/40/60 million?
Those are the original scoring thresholds and the right reference. New Classic keeps the same scoring core: point items, collection line, graze. Do not treat Challenge Mode's death counter as a new extend table.
Which shot should I use for a first Normal 1CC?
Reimu A or Marisa A. Reimu A covers messy stages; Marisa A shortens bosses. Compare them on the shot type ranking after you can clear Stage 3 clean.
Where do I go after beating Remilia?
If it was a no-continue Normal-or-higher clear, Extra unlocks. Read Extra Stage and How to Beat Flandre. Otherwise, Spell Practice the cards that ended the credit.